4.4 KiB
OpenManus-server 🤖
This project provides a server based on Model Context Protocol (MCP) that exposes OpenManus tool functionalities as standardized APIs.
✨ Features
This MCP server provides access to the following OpenManus tools:
- Browser Automation 🌐 - Navigate webpages, click elements, input text, and more
- Google Search 🔍 - Execute searches and retrieve result links
- Python Code Execution 🐍 - Run Python code in a secure environment
- File Saving 💾 - Save content to local files
- Termination Control 🛑 - Control program execution flow
🚀 Installation
Prerequisites
- Python 3.10+
- OpenManus project dependencies
Installation Steps
- First, install the OpenManus project:
git clone https://github.com/mannaandpoem/OpenManus.git
cd OpenManus
- Install dependencies:
# Using uv (recommended)
curl -LsSf https://astral.sh/uv/install.sh | sh
uv venv
source .venv/bin/activate  # Unix/macOS
# or .venv\Scripts\activate  # Windows
uv pip install -r requirements.txt
- Install MCP dependencies:
uv pip install -r openmanus_server/mcp_requirements.txt
Demo display
📖 Usage
1. Testing your server with Claude for Desktop 🖥️
⚠️ Note: Claude for Desktop is not yet available on Linux. Linux users can build an MCP client that connects to the server we just built.
Step 1: Installation Check ✅
First, make sure you have Claude for Desktop installed. You can install the latest version here. If you already have Claude for Desktop, make sure it's updated to the latest version.
Step 2: Configuration Setup ⚙️
We'll need to configure Claude for Desktop for this server you want to use. To do this, open your Claude for Desktop App configuration at ~/Library/Application Support/Claude/claude_desktop_config.json in a text editor. Make sure to create the file if it doesn't exist.
vim ~/Library/Application\ Support/Claude/claude_desktop_config.json
Step 3: Server Configuration 🔧
You'll then add your servers in the mcpServers key. The MCP UI elements will only show up in Claude for Desktop if at least one server is properly configured.
In this case, we'll add our single Openmanus server like so:
{
    "mcpServers": {
        "openmanus": {
            "command": "/ABSOLUTE/PATH/TO/PARENT/FOLDER/uv",
            "args": [
                "--directory",
                "/ABSOLUTE/PATH/TO/OpenManus/openmanus_server",
                "run",
                "openmanus_server.py"
            ]
        }
    }
}
💡 Tip: You may need to put the full path to the uv executable in the command field. You can get this by running:
- MacOS/Linux:
which uv- Windows:
where uv
Step 4: Understanding the Configuration 📝
This tells Claude for Desktop:
- There's an MCP server named "openmanus" 🔌
- To launch it by running
uv --directory /ABSOLUTE/PATH/TO/OpenManus/openmanus_server run openmanus_server.py🚀
Step 5: Activation 🔄
Save the file, and restart Claude for Desktop.
Step 6: Verification ✨
Let's make sure Claude for Desktop is picking up the six tools we've exposed in our openmanus server. You can do this by looking for the hammer icon ![]()
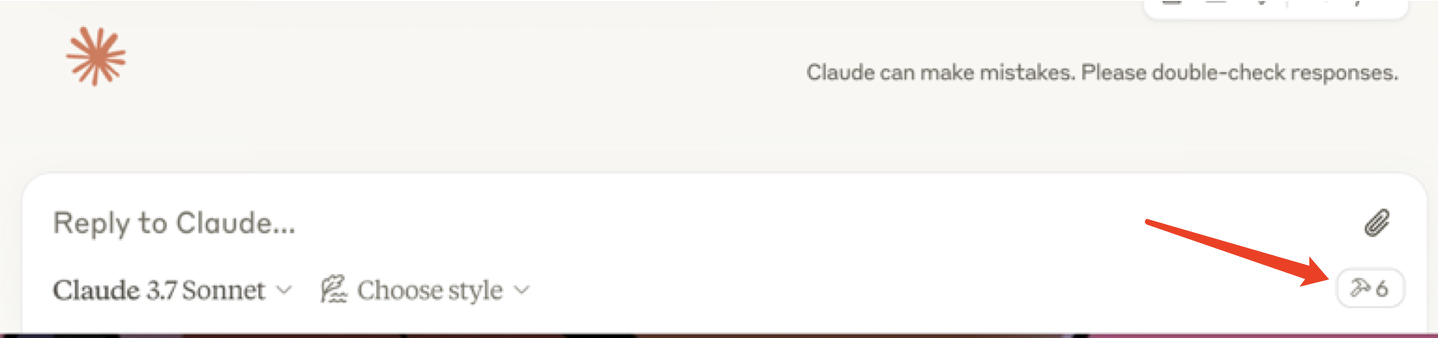
After clicking on the hammer icon, you should see tools listed:
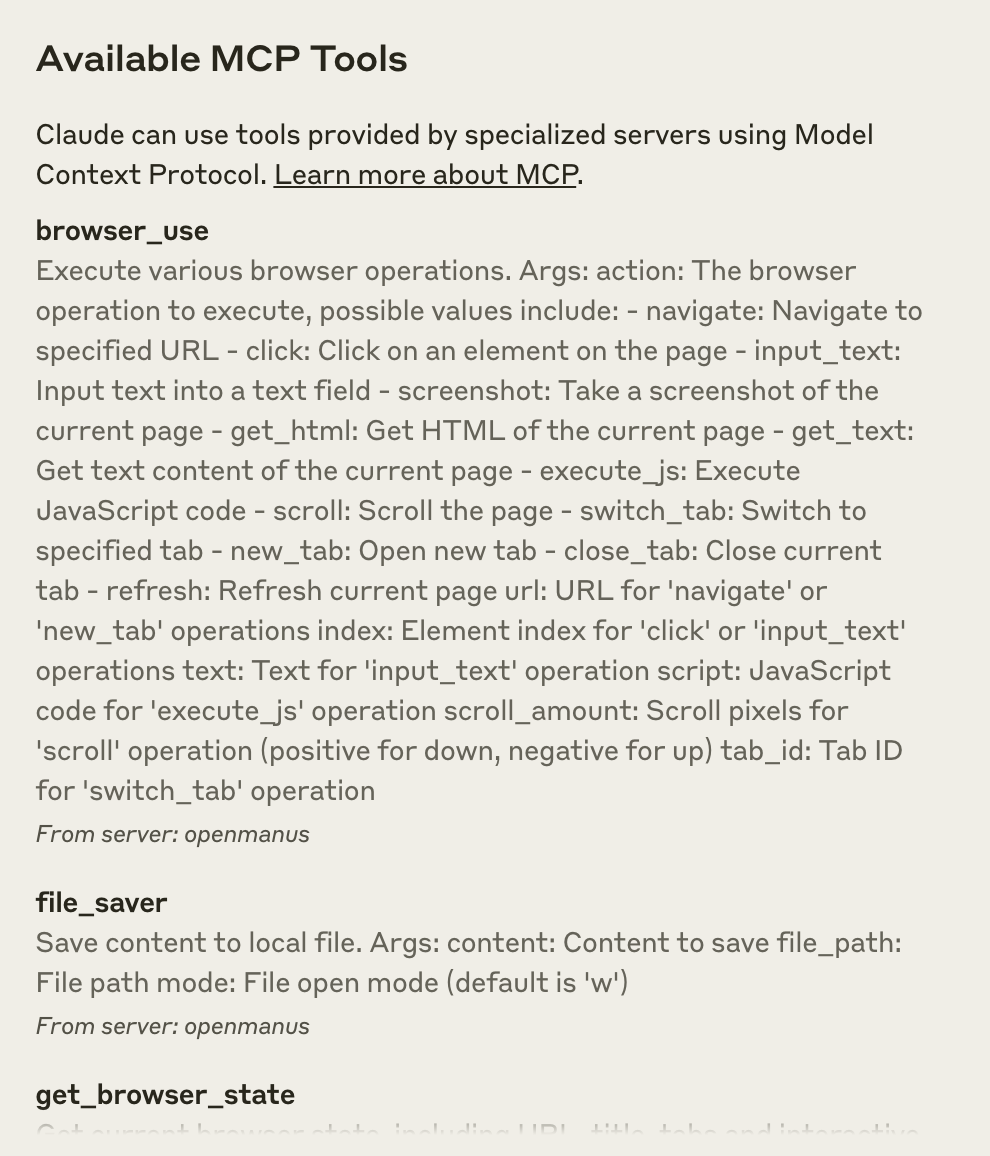
Ready to Test! 🎉
Now, you can test the openmanus server in Claude for Desktop:
- 🔍 Try to find the recent news about Manus AI agent, and write a post for me!
💻 2. Testing with simple Client Example
Check out openmanus_client_example.py to test the openmanus server using the MCP client.
uv run openmanus_server/openmanus_client_example.py openmanus_server/openmanus_server.py
🔒 Security Considerations
- When using in production, ensure proper authentication and authorization mechanisms are in place
- The Python execution tool has timeout limits to prevent long-running code
📄 License
Same license as the OpenManus project